You are able to process Cashbook transactions manually in Draftworx.
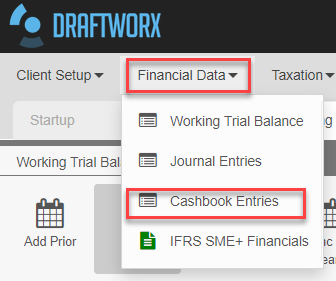
To process the cashbook go to Financial Data and then Select Cashbook Entries:
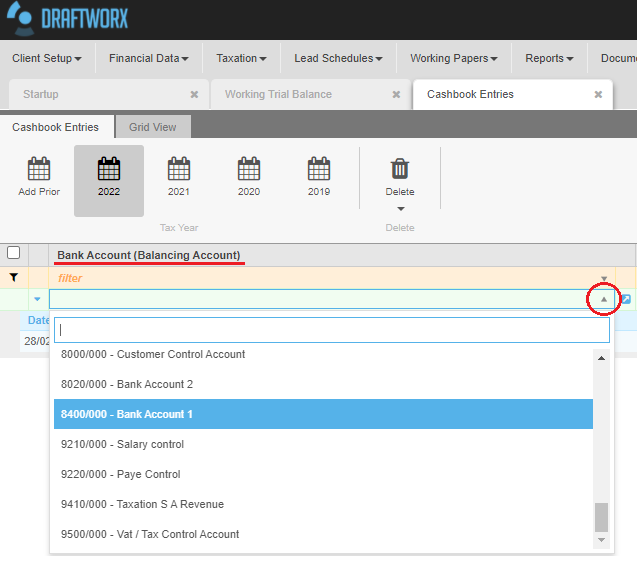
You will then see the Cashbook screen. To start processing you have to setup the bank account you will be processing to. To do this you can select your bank account from the green bar under the heading Bank Account (Balancing Account).
You can then select the Vat account (if applicable) in the same manner.
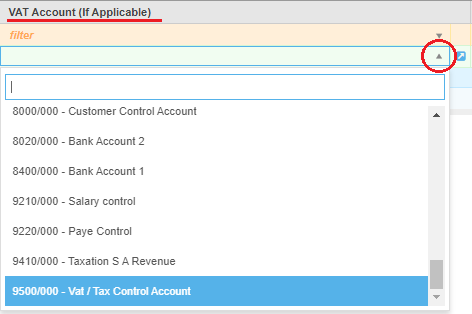
Once you selected the accounts you press Enter and you can start to input the cashbook:

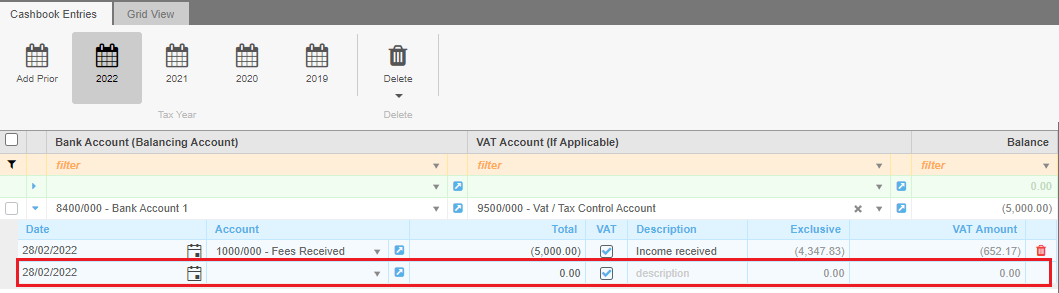
You will see the following headings in your cashbook:
Date: Select the date of the transaction that you are currently processing.
Account: Select the account that will be affected by this transaction in the drop down.
Total: Enter the full transaction value here.
VAT: Mark the transaction as VAT inclusive or exclusive. This will be deactivated if you do not have a VAT account selected for the cashbook.
Description: Enter a description for the transaction here.
Exclusive: This amount will automatically be calculated.
VAT Amount: This amount will automatically be calculated if the transaction includes VAT.
The second line will open up as soon as you start entering data on the first, so once you are done with the first entry you can just start on the second line:
If you want to delete a line, you can select the red trash icon at the end of the row:
